01 – Setup
Installing the plugin is very easy just like any other wordpress plugin. You can upload it with your zip file by clicking Plugins > Add New > Install Plugin in your WordPress dashboard, or connect to your Hosting and upload the extracted zip file folder of the plugin into wp-content/plugins/. Then go to wp-admin->plugins-> and Enable Easy Multiplexing.
02 – Fields Page
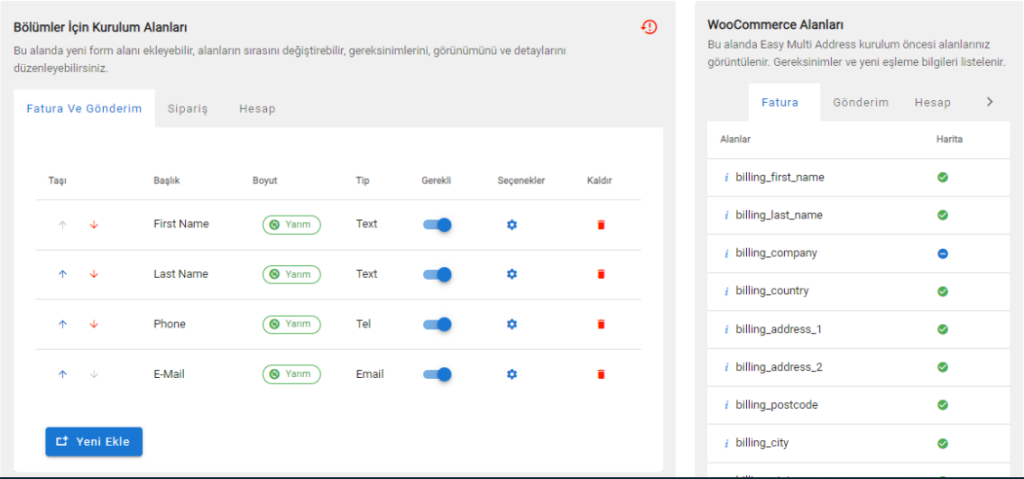
In this area, you can add a new form field, change the order of the fields, edit their requirements, appearance and details.
WooCommerce Fields
In this area, your pre-installation fields for Easy Multi-Address Plugin are displayed. Requirements and new mapping information are listed.

03 – Settings Page
General settings for your multiple addresses; invoice, full address etc.
Invoice Area
You can specify the tax information fields you want to receive from your customers from this field.
Address Fields
You can use this field to change the address field group. By default, you can only sell to one country and you can remove the country selection field from the address fields. You can change the mandatory status of all other fields from this page.
Modlar
Select the mode of your payment page from this field and turn on/off the display of account and order fields.
1. Dijital Mod
This mode has been developed for sites that sell digital products that do not require shipping, your customers can only shop by registering their billing addresses.
2.Invoice Mode
This mode is the standard woocommerce mode, it is used to get billing addresses and shipping addresses from our customers.
3. Transmission Mode
This mod works on the same principle as the standard woocommerce mod, but first presents the fields of the shipping address to the customer.
Haven't found the answer? We can help.
Submit a requestContact us and we'll get back to you as soon as possible.
